

VPN Installation Instructions
Virtual Private Network (VPN) can be used by faculty and staff to connect to Weber State's secure network from off campus. To connect, you will need to have a VPN desktop client installed on the computer you plan to use while off campus.
Weber State supports the Cisco AnyConnect VPN Client which is pre-installed on many WSU laptops and can also be installed on personal devices.
Please note: Duo must be enabled on your eWeber account before you can use the VPN. If you are not enrolled in Duo yet, visit the Duo Mobile Self Service channel in the eWeber portal.
Refer to the following sections on this page:
Cisco AnyConnect VPN Client
The Cisco AnyConnect Secure Mobility Client is the Weber State supported VPN software and what is covered in this instruction set. However, other VPN clients may work by pointing to our VPN server: vpn.weber.edu
AnyConnect will work on most computing devices (full list of hardware and software requirements).
Windows Installation Instructions
If you are installing VPN software on a Weber State Windows computer, Cisco AnyConnect can be installed through the Software Center application without the need for administrator privileges. Otherwise a manual install can be performed.
To manually install Cisco AnyConnect on Windows:
- Visit https://vpn.weber.edu
- Login with your Wildcat username and password.
- Follow on screen instructions to complete the install (this may require administrator credentials, contact your department's CTC or the IT Service Desk for assistance).
- After the application is successfully installed, click the Start button, then search for and select the Cisco AnyConnect Mobility Client application.

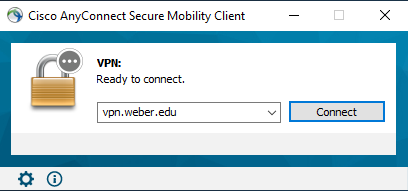
- Once the application is open, type vpn.weber.edu in the connection bar then click Connect.
- A new Central Authentication System (CAS) window will appear asking for your WSU username and password. Enter in the required information and click Login.
- Your computer should now be connected to WSU's network services.
- When finished, disconnect by opening the Cisco AnyConnect Mobility Client and click the Disconnect button.
Mac Installation Instructions
If you are installing VPN software on a Weber State Windows computer, Cisco AnyConnect can be installed through the Self Service application without the need for administrator privileges. Otherwise a manual install can be performed.
To manually install Cisco AnyConnect on macOS:
- Visit https://vpn.weber.edu
- Login with your Wildcat username and password.
- Follow on screen instructions to complete the install (this may require administrator credentials, contact your department's CTC or the IT Service Desk for assistance).
- Once it's successfully installed, navigate to the Go menu and click on Applications and find the folder named Cisco.

-
Open the Cisco AnyConnect Mobility Client inside the Cisco folder.
- In the connection bar, type: vpn.weber.edu then click connect.
- A new window will appear asking for your WSU username and password. Enter the required information and click Login.
- Your computer should now be connected to WSU's network services.
- When finished, disconnect by opening the Cisco AnyConnect Mobility Client and click the Disconnect button.
Mobile Device Installation Instructions
iOS (iPhone / iPad)
VPN is not supported on all versions of iOS. A device must have Apple iOS 10.3 or later installed for Cisco AnyConnect to work.
- Download the Cisco Secure Client application from the App Store.
- Open the AnyConnect application once installed.
- Tap Connections and then Add VPN connection.
- Next to Server Address enter vpn.weber.edu then select Save in the upper right.
- Press Allow on the prompt to allow Anyconnect to add VPN configurations to iOS.
- Press Back to go back to AnyConnect's main window, then toggle the AnyConnect VPN option on.
- Log in with your WSU username and password on the CAS page.
- Your device should now be connected to WSU's network.
- When finished, disconnect by opening the AnyConnect app and toggle the AnyConnect VPN option to off.
Android
VPN is not supported on all Android devices. You must have Android 4.0 or later installed for Cisco AnyConnect to work.
- Download the Cisco AnyConnect application from the Google Play Store.
- Open the AnyConnect application once installed.
- Tap Connections and then Add VPN connection.
- Next to Server Address enter vpn.weber.edu then select Save in the upper right.
- Press Allow on the prompt to allow Anyconnect to add VPN configurations to iOS.
- Press Back to go back to AnyConnect's main window, then toggle the AnyConnect VPN option on.
- Log in with your WSU username and password on the CAS page.
- Your device should now be connected to WSU's network.
- When finished, disconnect by opening the AnyConnect app and toggle the AnyConnect VPN option to off.