
Grade Submission through Self-Service
Last Update: 11/21/2014
Step 1: GETTING INTO LYNX SELF-SERVICE
• Log in to your eWeber portal (current version) and CLICK the Faculty Tab
• Find the Lynx Self-Service channel box and CLICK on Lynx-Self Service Main Menu
If you do not have the Lynx Self-Service channel, complete the following steps:
• Find the Lynx Self-Service channel box and CLICK on Lynx-Self Service Main Menu
If you do not have the Lynx Self-Service channel, complete the following steps:
- CLICK Content/Layout (Add a channel) in upper left corner
- Find and click on Lynx Self-Service in the Add a Channel box
- CLICK Add channel
• CLICK Faculty & Advisors
»If you do not have a Faculty & Advisors link, please contact your department to have the correct
account requested and complete the Confidentiality and Acceptable Use Agreement which is filed with the Registrar’s Office.
»If you do not have a Faculty & Advisors link, please contact your department to have the correct
account requested and complete the Confidentiality and Acceptable Use Agreement which is filed with the Registrar’s Office.
- CLICK "Input Final Grades - BannerXE" on the Faculty Services page
Step 2: SELECTING A COURSE FOR FINAL GRADE INPUT

Color Status Key:
Blank – no grades entered or rolled to student academic history
Orange under Grading Status – some grades entered
Orange under Rolled – some grades rolled to student academic history
Green under Grading Status -- all grades entered
Green also under Rolled – all grades rolled to student’s academic history
SELECT the CRN/Course for which you wish to enter Final Grades by clicking within the row for that course. The class roll will be generated below.
If the class is not listed, this means that your department has not yet had you assigned as the primary instructor for this course. Please contact your department to have the course assigned to you as the primary instructor.
Step 3: INPUTTING THE FINAL GRADE
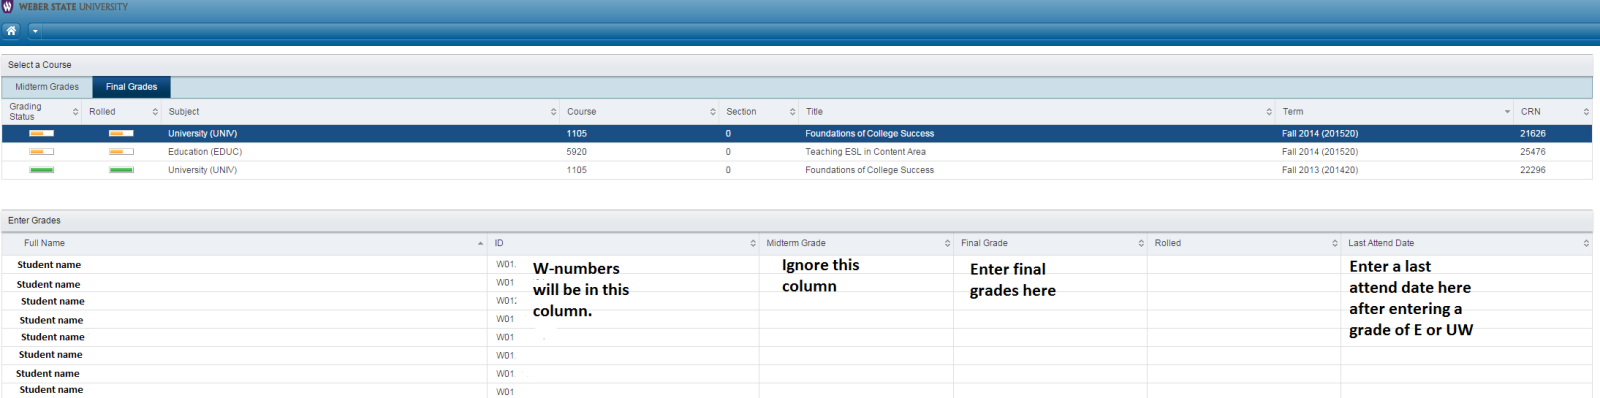
Click inside the “Final Grade” column next to the student you want to assign a grade to. This will open a grading box.
In that box type in the grade you wish to assign, or use the arrow on the right side of the box to select the grade from a drop-down menu.
Entering an "I" grade will open the “Incomplete Grades” tab next to the “Roster” tab. Here you will have the option of modifying the defaults for “Extension Date” and the “Incomplete Final Grade”. The “Incomplete Final Grade” will be automatically entered if the instructor does not submit an email grade change to the Records Office (see above) before the “Extension Date” is passed. Click “Save” after making any changes to the defaults. Click the “Roster” tab to go back to grading the rest of the class.
If you enter an “E” or a “UW” for the student, click in the Date Last Attended field and input the last date of attendance (MM/DD/YYYY).
Do not enter any information in the "Hours Attended" column. The Registration Office handles this item.
Do not enter any information in the "Hours Attended" column. The Registration Office handles this item.
CLICK the SAVE button often to save your progress
Answers to many specific grading questions can be found at this link: https://www.weber.edu/Records/FAQs.html
I